Red Velvet Cookies — The Best Soft & Chewy Recipe
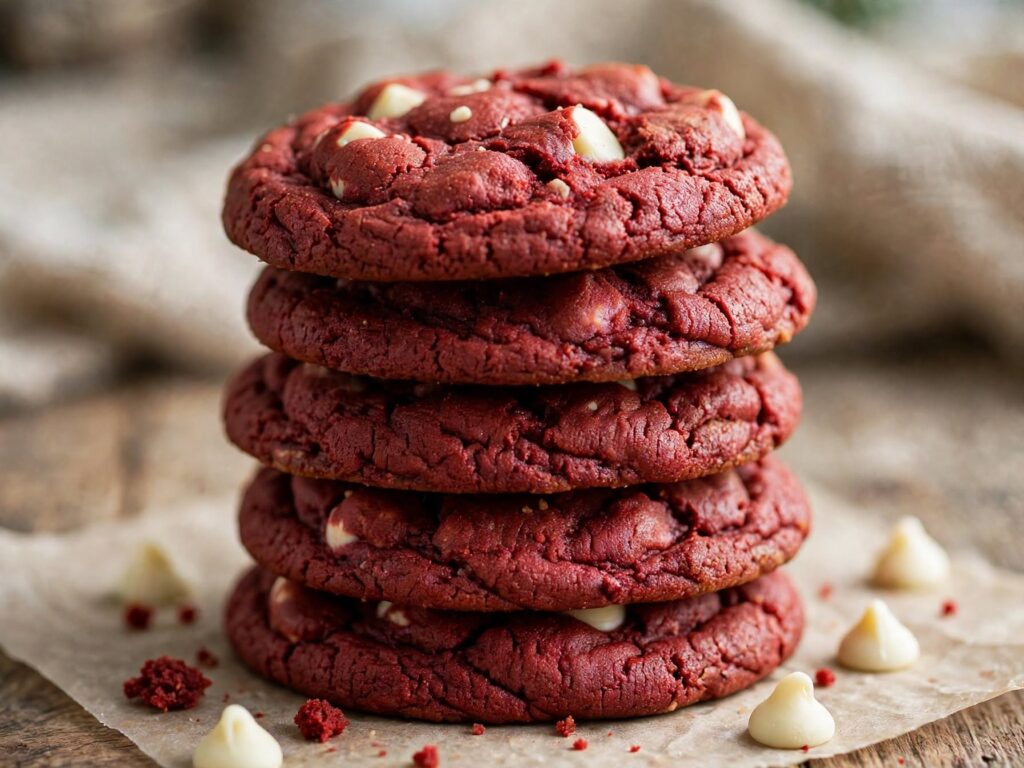
These red velvet cookies bake up soft, thick, and chewy with that signature deep-red color and gentle cocoa flavor — no cake mix, no chilling-overnight fuss. You get bakery-style cookies studded with white chocolate chips in about an hour, and this version tells you exactly how to keep them red instead of muddy brown. Everything below is built to give you a real cookie decision, not a wall of copy.
| Prep time | 20 minutes |
| Chill time | 30 minutes |
| Bake time | 11 minutes |
| Total time | about 1 hour |
| Yield | 24 cookies |
| Difficulty | Easy |
| Cuisine | American |
| Key method | Creamed butter + acidic natural cocoa, briefly chilled, baked hot and pulled soft |
In This Post
- Why You’ll Love It
- What Makes It Different
- Ingredients & Substitutions
- Equipment You’ll Need
- How to Make It
- Getting Them Actually Red
- Expert Tips
- Secret to Soft, Chewy Cookies
- Nutella-Stuffed, Cake Mix & Chocolate Frosted
- Variations & Add-Ins
- What to Serve With It
- Storage & Make-Ahead
- Troubleshooting
- Nutrition Information
- FAQ
- Recipe Card
Why You’ll Love These Red Velvet Cookies
- Soft in the middle, set at the edges — the egg-yolk-plus-whole-egg combo builds chew without dryness.
- Actually red, not brown — natural (not Dutch) cocoa plus gel coloring keeps the color vivid.
- No cake mix — real from-scratch flavor with light cocoa and a tang of vanilla.
- Thick, not flat — a quick 30-minute chill stops the dough from spreading into wafers.
- One bowl of dry, one bowl of wet — minimal cleanup, no stand mixer required.
- Freezer-friendly dough — scoop, freeze, and bake fresh cookies any night.
What Makes These Red Velvet Cookies Different
The differentiator is acidity. A teaspoon of white vinegar reacts with natural cocoa and baking soda to give you a tender, slightly tangy crumb and a redder finished cookie — the same chemistry that defines classic red velvet cake, applied to a cookie. Most cookie recipes skip it; that’s why so many red velvet cookies read as “chocolate cookies dyed red.” Here the acid does double duty on texture and color.
Ingredients You’ll Need
- 2¼ cups (280 g) all-purpose flour
- ¼ cup (21 g) unsweetened natural cocoa powder
- 1 tsp baking soda
- ½ tsp fine salt
- ¾ cup (170 g) unsalted butter, softened
- ¾ cup (150 g) granulated sugar
- ½ cup (100 g) packed light brown sugar
- 1 large egg + 1 large egg yolk, room temperature
- 2 tsp vanilla extract
- 1 tsp white vinegar
- 1 tbsp gel red food coloring (or 2 tbsp liquid)
- 1¼ cups (210 g) white chocolate chips
Ingredient Notes
- Natural cocoa powder is doing the color work — it’s acidic and reacts with baking soda, which keeps the cookies red and lightly leavened. Reach for a modest amount; red velvet is only faintly chocolatey, and too much cocoa turns the dough brown.
- Gel food coloring gives a saturated red without thinning the dough the way liquid coloring can.
- Both sugars matter: granulated sugar spreads and crisps the edges, brown sugar holds moisture for chew.
- The extra egg yolk adds fat and richness that keeps centers soft after they cool.
- White chocolate chips are the traditional partner — their sweetness balances the tang and reads clearly against the red.
- Vanilla extract. Most pure vanilla extract is alcohol-based; use an alcohol-free or imitation vanilla if you want to keep this halal.
Substitutions & Swaps
- No white chocolate? Use white chocolate chunks, or swap for cream cheese chips or dark chocolate chips (color contrast is stronger with white).
- Dutch-process cocoa only? It works for flavor but mutes the red and the leavening — add ½ tsp baking powder alongside the soda and expect a browner cookie.
- No vinegar? Use 1 tsp fresh lemon juice for the same acidity.
- Gluten-free: a 1:1 gluten-free baking blend with xanthan gum works; chill the dough the full 30 minutes as GF dough spreads faster.
- Dairy-free: vegan butter and dairy-free white chips; see the vegan variation below for the egg swap.
Equipment You’ll Need
- Two baking sheets
- Parchment paper or silicone mats
- Mixing bowls (one large, one medium)
- Hand or stand mixer
- 2-tablespoon cookie scoop — for even, bakery-round cookies
- Wire cooling rack
How to Make Red Velvet Cookies
Step 1 — Whisk the Dry Ingredients
In a medium bowl, whisk the flour, natural cocoa, baking soda, and salt until the cocoa is evenly streaked through — no dark pockets. Even distribution here is what gives you consistent color and rise across the batch.
Step 2 — Cream the Butter and Sugars
Beat the softened butter with both sugars on medium for 2–3 minutes, until noticeably lighter in color and fluffy. This aerates the dough so the cookies stay tender rather than dense.

Step 3 — Add the Wet Ingredients
Beat in the whole egg, then the yolk, then the vanilla, vinegar, and red gel coloring. Mix until the color is fully uniform and deep red — it will look brighter now than after baking, which is normal.

Step 4 — Combine
Add the dry mixture to the wet and mix on low just until no flour streaks remain. Stop the moment it comes together; overmixing develops gluten and makes cookies tough.
Step 5 — Fold in the White Chocolate
Fold the white chocolate chips through by hand with a spatula. Reserve a small handful to press onto the tops of the dough balls later for a bakery look.

Step 6 — Chill the Dough
Cover and chill for 30 minutes. Cold dough spreads slower, so the cookies stay thick with soft centers instead of going flat.
Step 7 — Scoop and Bake
Scoop 2-tablespoon mounds onto lined sheets, 2 inches apart, and press the reserved chips on top. Bake at 350°F (175°C) for 10–12 minutes, until the edges are set but the centers still look slightly underdone.

Step 8 — Cool
Let the cookies sit on the hot sheet for 5 minutes to finish setting, then move to a wire rack. They firm up as they cool — pulling them soft is what keeps the middles chewy.

How Do You Get Red Velvet Cookies Actually Red?
Use natural (not Dutch-process) cocoa, gel coloring, and a teaspoon of acid. Natural cocoa is acidic, and that acidity preserves the red pigment during baking; Dutch cocoa is alkalized and turns the dough brown. Gel coloring delivers concentrated color without watering the dough down, and the vinegar reinforces the acidic environment. Add the coloring to the wet ingredients so it disperses evenly, and keep the cocoa quantity restrained — the more cocoa you add, the browner the finished cookie, no matter how much dye you use.
Expert Tips for the Best Red Velvet Cookies
- Weigh your flour if you can. Too much flour is the number-one cause of dry, cakey red velvet cookies — spoon-and-level if you don’t have a scale.
- Don’t skip the chill, even a short one. Room-temperature dough spreads into thin cookies with no chew.
- Underbake slightly. Pull them when the centers look barely set; residual heat finishes them on the sheet.
- Room-temperature egg and butter blend into a smoother dough and trap more air during creaming.
- Rotate the sheet halfway for even color and bake, especially if your oven runs hot on one side.
- Add color in stages and stop when it’s a shade deeper than you want raw — baking dulls it slightly.
💡 Tip: Pull the cookies from the oven while the centers still look slightly underdone. They keep cooking on the hot sheet for the first 5 minutes — that carryover set is what keeps the middles soft and chewy instead of dry.
The Secret to Soft, Chewy Red Velvet Cookies
The chew comes from moisture-holding ingredients plus an early pull from the oven. Brown sugar is hygroscopic — it holds onto water — so it keeps the crumb moist as the cookies cool. The extra egg yolk adds fat and emulsifiers that make the texture rich rather than crumbly. Baking soda gives a quick rise and a soft interior instead of a crisp snap. Finally, taking the cookies out while the centers still look soft means they set from carryover heat, not in the oven, which is the difference between chewy and dry.
Red Velvet Cookies Three Ways: Nutella-Stuffed, Cake Mix & Chocolate Frosted
The from-scratch dough above is the best base, but it’s easy to dress up or shortcut. Here are three popular ways to make red velvet cookies: stuffed with Nutella, made from a cake mix, and topped with chocolate frosting.
Nutella Stuffed Red Velvet Cookies – So Gooey
Nutella-stuffed red velvet cookies hide a molten chocolate-hazelnut center inside a soft red cookie. Spoon 1-teaspoon dollops of Nutella onto a parchment-lined plate and freeze them for at least 30 minutes, until firm. Frozen dollops are easy to wrap, and they stay inside the cookie instead of leaking out in the oven.
Flatten a 2-tablespoon scoop of dough in your palm, set a frozen dollop in the middle, and pinch the dough closed around it, rolling it into a smooth ball. Bake as directed in the recipe, adding 1–2 minutes, until the edges are set. Let the cookies rest on the hot sheet for the full 5 minutes. The center is at its gooiest while they’re still warm, and a little extra rest keeps the filling from spilling when you move them. Skip pressing chips on top, which can crack the seam.
Easy Red Velvet Cake Mix Cookies (3 Ingredients)
If you want the fastest possible version, red velvet cake mix cookies need just three ingredients: one box of red velvet cake mix (about 15 oz), 2 large eggs, and ½ cup of vegetable oil. Stir them together until a thick, soft dough forms, then fold in white chocolate chips if you’d like.
Scoop 2-tablespoon mounds onto lined sheets, 2 inches apart, and bake at 350°F (175°C) for 8–10 minutes, until the edges are set and the centers still look slightly underdone. Cool on the sheet for 5 minutes before moving them to a rack. Cake mix cookies are softer and more cake-like than the scratch recipe above, which has more tang and a chewier bite, but they take about 15 minutes from bowl to oven. If the dough feels very sticky, chill it for 20–30 minutes before scooping.
Red Velvet Cookies with Chocolate Frosting
Chocolate frosting is a rich contrast to the mild, tangy red velvet cookie. Bake and cool the cookies completely first, since frosting on warm cookies melts and slides off. Then spread a thin layer, about a tablespoon per cookie, over the top.
For a homemade version, use the chocolate variation from our buttercream frosting recipe. A half batch is plenty for 24 cookies. Finish with red velvet cookie crumbs, mini chocolate chips, or sprinkles, and let the frosting set for 15–20 minutes before stacking. For a classic red velvet look, you can swirl chocolate frosting over some cookies and cream cheese glaze over others.
💡 Tip: Whichever version you make, keep the cookies slightly underdone when you pull them. They finish setting on the hot sheet, and that carryover heat is what keeps the centers soft under frosting or around a filling.
Delicious Variations & Add-Ins
Cream Cheese–Stuffed Red Velvet Cookies
Freeze ½-teaspoon dollops of sweetened cream cheese, then wrap each in dough before baking for a molten cheesecake center. Add 1–2 minutes to the bake.
Red Velvet Crinkle Cookies
Roll each dough ball in granulated sugar, then powdered sugar, before baking. The powdered sugar cracks as the cookies spread for the classic crackle-top look.
Lighter / Healthier Version
Swap half the butter for unsweetened applesauce and reduce granulated sugar to ½ cup. Expect a slightly softer, more cake-like cookie.
Dairy-Free & Vegan Version
Use vegan butter, dairy-free white chips, and replace the egg + yolk with 2 flax eggs (2 tbsp ground flax + 5 tbsp water, rested 10 minutes). Chill the dough a full 45 minutes.
Bakery-Style Giant Cookies
Scoop ¼-cup mounds instead, space them 3 inches apart, and bake 13–15 minutes for thick, soft-centered giant cookies.
What to Serve With Red Velvet Cookies
- Cream cheese glaze drizzled on top — echoes the classic red velvet cake frosting.
- Hot coffee or espresso — the bitterness balances the sweet white chocolate.
- Vanilla ice cream — sandwich two cookies for an instant ice cream sandwich.
- Hot cocoa — a cozy pairing for a holiday or winter cookie platter.
How to Store Red Velvet Cookies
At Room Temperature
Keep in an airtight container for up to 5 days. Add a slice of sandwich bread to the container — the cookies pull moisture from it and stay soft.
In the Refrigerator
Refrigeration dries cookies out and isn’t recommended for baked cookies. Chill only if they contain a cream cheese filling — then store up to 4 days and bring to room temperature before serving.
Freezing & Thawing
Yes, you can freeze them — both baked and as dough. Freeze baked cookies in a single layer, then bag for up to 3 months; thaw at room temperature. For fresh-baked-any-time cookies, freeze scooped dough balls solid, bag them, and bake from frozen with 1–2 extra minutes.
Make-Ahead Instructions
Make the dough up to 3 days ahead and keep it covered in the fridge; let it sit out 15 minutes before scooping so it’s workable. For longer lead time, freeze scooped dough balls and bake straight from frozen — no thawing needed, just add a couple of minutes.
Troubleshooting Common Problems
Why Did My Red Velvet Cookies Turn Brown?
Almost always the cocoa. Dutch-process cocoa is alkalized and browns during baking — switch to natural cocoa, keep the amount modest, and use gel coloring plus vinegar to hold the red.
Why Did My Red Velvet Cookies Spread Too Much?
The dough was too warm or the butter was melted rather than softened. Chill the dough the full 30 minutes, use softened-not-melted butter, and bake on a cool sheet — hot sheets restart the spreading.
Why Are My Red Velvet Cookies Dry or Cakey?
Too much flour or overbaking. Spoon-and-level (or weigh) your flour, don’t pack the cup, and pull the cookies while the centers still look soft. Overmixing after adding flour also toughens them.
Nutrition Information
Per cookie (1 of 24), approximate:
- Calories: 190
- Fat: 9 g
- Carbohydrates: 26 g
- Sugar: 18 g
- Protein: 2 g
- Sodium: 95 mg
Values are an estimate and vary with brands and cookie size.
Frequently Asked Questions
Do red velvet cookies taste like chocolate?
Only faintly. Red velvet uses a small amount of cocoa, so you get a mild chocolate note balanced by vanilla and a slight tang, not a full chocolate cookie.
Why is there vinegar in red velvet cookies?
The acid reacts with natural cocoa and baking soda to tenderize the crumb and preserve the red color. You won’t taste it in the finished cookie.
Can I use liquid food coloring instead of gel?
Yes, but use about double the amount and expect a slightly softer dough. Gel gives a more saturated red without thinning the batter.
Do I have to chill the dough?
For thick, chewy cookies, yes — at least 30 minutes. Skipping the chill gives thinner, flatter cookies.
Can I make these without white chocolate chips?
Absolutely. Leave them out, or swap in dark chocolate chips, chopped chocolate, or cream cheese chips.
Why did my cookies come out flat?
Warm dough, melted butter, or too little flour. Chill the dough and measure flour carefully.
Can I freeze red velvet cookie dough?
Yes. Freeze scooped dough balls solid, bag them for up to 3 months, and bake from frozen with 1-2 extra minutes.
How do I make red velvet crinkle cookies from this recipe?
Roll each dough ball in granulated sugar, then powdered sugar, before baking. The coating cracks into the classic crinkle top.
What cocoa is best for red velvet cookies?
Natural unsweetened cocoa. It’s acidic, keeps the color red, and reacts with baking soda for a soft crumb.
Are red velvet cookies supposed to be soft or crispy?
Soft and chewy in the center with just-set edges. Pull them from the oven while the middles still look slightly underdone.
Related Recipes
Recipe Card

Red Velvet Cookies
Soft, chewy red velvet cookies with white chocolate chips, made from scratch with natural cocoa for a truly red color.
24
cookies20
minutes11
minutes1
hour1
minuteIngredients
2¼ cups (280 g) all-purpose flour
¼ cup (21 g) unsweetened natural cocoa powder
1 tsp baking soda
½ tsp fine salt
¾ cup (170 g) unsalted butter, softened
¾ cup (150 g) granulated sugar
½ cup (100 g) packed light brown sugar
1 large egg, room temperature
1 large egg yolk, room temperature
2 tsp vanilla extract
1 tsp white vinegar
1 tbsp gel red food coloring (or 2 tbsp liquid)
1¼ cups (210 g) white chocolate chips
Directions
- Whisk flour, cocoa, baking soda, and salt in a medium bowl.
- Cream butter with both sugars on medium 2–3 minutes until light and fluffy.
- Beat in the egg, then the yolk, then vanilla, vinegar, and red gel coloring until the color is uniform.
- Add the dry ingredients and mix on low just until combined.
- Fold in the white chocolate chips, reserving a handful for topping.
- Cover and chill the dough 30 minutes.
- Scoop 2-tablespoon mounds onto lined sheets, 2 inches apart; press reserved chips on top.
- Bake at 350°F (175°C) for 10–12 minutes, until edges are set and centers look slightly underdone.
- Cool on the sheet 5 minutes, then transfer to a wire rack.
Notes
- Use natural, not Dutch-process, cocoa for the reddest color.nDon’t skip the chill — it keeps the cookies thick and chewy.nUnderbake slightly; they set as they cool.