Apple Crisp — The Best Easy, Crunchy-Topped Recipe
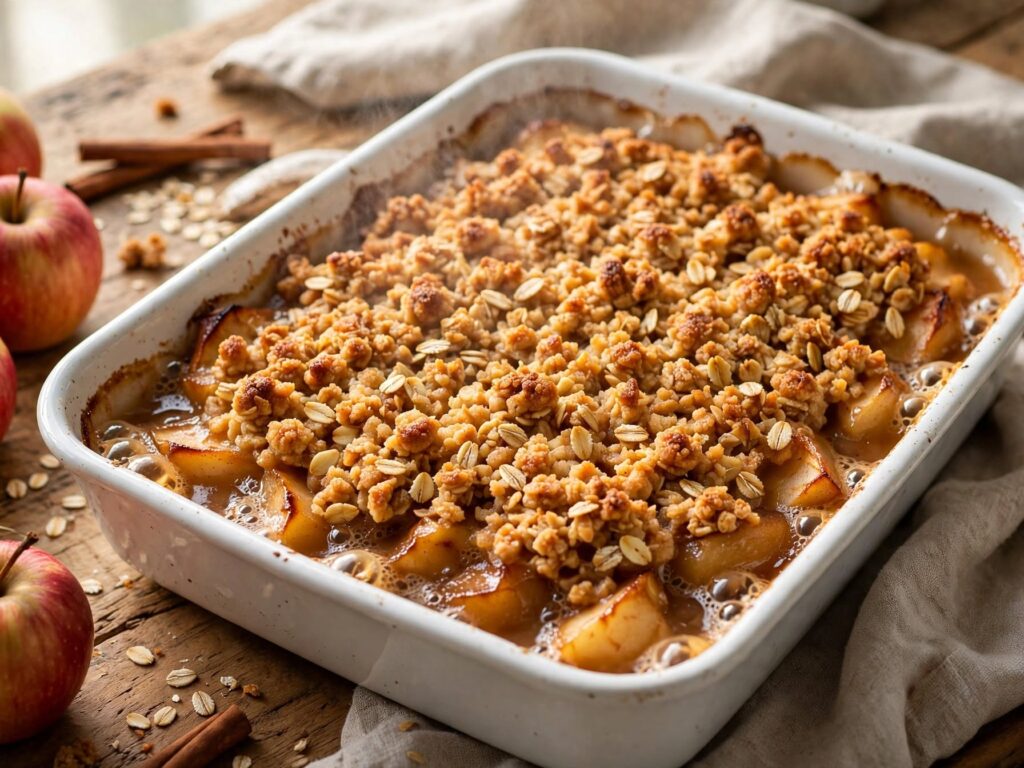
Apple crisp is the fastest way to get warm, spiced baked apples under a golden, crunchy topping — no pie crust, no fuss. This recipe gives you tender-but-not-mushy fruit, a topping that actually stays crisp, and a filling that’s saucy without turning watery. Everything comes together in one bowl and one dish, and it’s ready in about an hour.
| Prep time | 20 minutes |
| Cook time | 45 minutes |
| Total time | 1 hour 5 minutes (plus 15 minutes to rest) |
| Servings | 8 |
| Difficulty | Easy |
| Cuisine | American |
| Key method | Toss, top, and bake at 350°F (175°C) in a single dish |
If you want a homemade fruit dessert with almost no technique required, this is the one to make tonight.
In This Post
Why You’ll Love This Apple Crisp
- Genuinely crisp topping — a proper ratio of oats, butter, and brown sugar that bakes crunchy, not damp.
- Tender apples with real bite — a two-apple blend that softens without collapsing into sauce.
- No soggy bottom — a light coat of flour thickens the juices so the filling stays spoonable.
- One bowl, one dish — minimal cleanup and no dough to roll or chill.
- Make-ahead friendly — the topping can be mixed and frozen days in advance.
- Reliably golden — clear visual cues tell you exactly when it’s done.
What Makes This Apple Crisp Different
The difference is the topping structure. A crisp is defined by rolled oats — that’s what separates it from a crumble, which uses only flour and sugar. Here the oats are balanced with just enough cold butter to bind into loose clusters rather than a wet paste. Those clusters brown independently, so you get crunchy peaks and a shatter-crisp surface instead of a flat, cakey lid. The filling is deliberately under-sugared so the topping carries the sweetness and the apples taste like apples.
Ingredients You’ll Need
For the apple filling:
- 6 medium apples (about 2½ lbs / 1.1 kg), peeled, cored, and sliced ¼-inch thick
- ¼ cup (50 g) granulated sugar
- 1 tablespoon fresh lemon juice
- 1 tablespoon all-purpose flour (or 2 teaspoons cornstarch)
- 1 teaspoon ground cinnamon
- ¼ teaspoon ground nutmeg
- Pinch of salt
For the crisp topping:
- 1 cup (90 g) old-fashioned rolled oats
- ¾ cup (95 g) all-purpose flour
- ¾ cup (150 g) packed light brown sugar
- ½ teaspoon ground cinnamon
- ¼ teaspoon salt
- ½ cup (113 g) cold unsalted butter, cut into small cubes
Ingredient Notes
- Apples are the heart of the dish — use a mix of one firm-tart and one firm-sweet variety so the filling holds its shape and stays balanced.
- Old-fashioned rolled oats, not quick or instant, give the topping its crunch. Quick oats absorb moisture and turn soft.
- Brown sugar brings moisture and a light caramel note; its molasses content is what helps the topping clump and brown.
- Cold butter is non-negotiable for texture — cutting it into the dry mix in small pieces creates the crumbly clusters that crisp up in the oven.
- Lemon juice brightens the apples and keeps them from tasting flat under all that sugar.
- Flour or cornstarch thickens the released juices just enough to keep the filling from being runny.
Substitutions & Swaps
- Gluten-free: Swap the all-purpose flour (in both filling and topping) for a 1:1 gluten-free blend, and use certified gluten-free oats. Texture stays nearly identical.
- Dairy-free / vegan: Use a firm vegan butter or cold coconut oil in place of the butter. Chill it well so it stays solid when you mix.
- No oats on hand: Leave them out and increase the topping flour to 1¼ cups — you’ll have a crumble instead of a crisp, still delicious.
- Less sugar: Reduce the topping brown sugar to ½ cup; the filling can drop to 2 tablespoons for tart apples.
- Add nuts: Fold ½ cup chopped pecans or walnuts into the topping for extra crunch.
Equipment You’ll Need
- 8×8-inch or 9×9-inch baking dish (or a 2-quart casserole)
- Vegetable peeler and sharp knife (or apple slicer)
- Large mixing bowl
- Medium bowl for the topping
- Pastry cutter or your fingertips for cutting in butter
- Measuring cups and spoons
How to Make Easy Apple Crisp
Step 1 — Prep the Oven and Dish
Preheat the oven to 350°F (175°C). Lightly butter your baking dish so the edges release cleanly.
Step 2 — Slice and Season the Apples
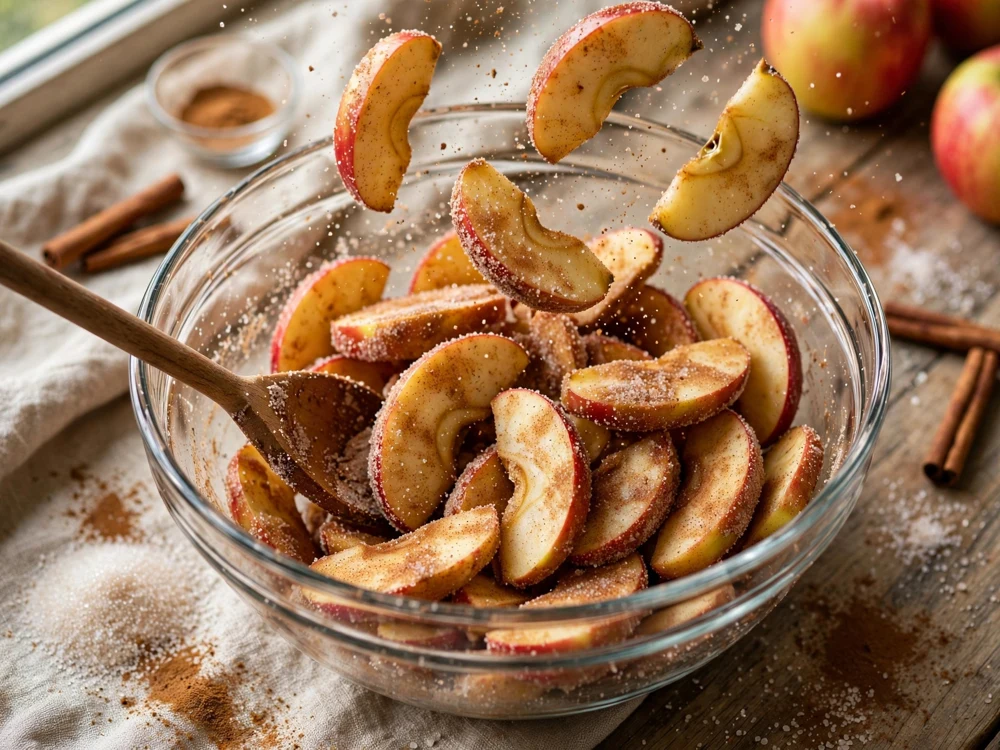
Peel, core, and slice the apples ¼-inch thick, then add them to a large bowl. Toss with the granulated sugar, lemon juice, flour, cinnamon, nutmeg, and salt until every slice is coated and glossy.
Step 3 — Fill the Dish
Transfer the apples to the prepared dish and spread them into an even layer. Press down gently so there are no large gaps — this helps the fruit cook evenly.
Step 4 — Make the Topping
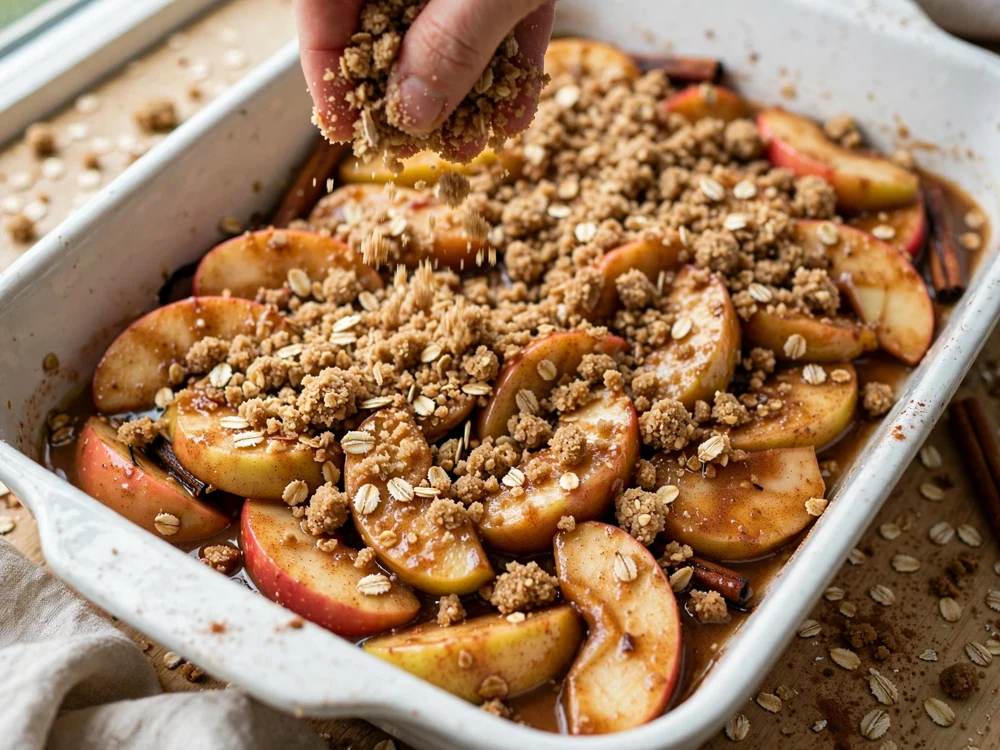
In a medium bowl, stir together the oats, flour, brown sugar, cinnamon, and salt. Add the cold butter cubes and cut them in with a pastry cutter or your fingers until the mixture forms crumbly clusters ranging from pea-size to small marble-size. You want texture, not sand.

Step 5 — Top and Bake
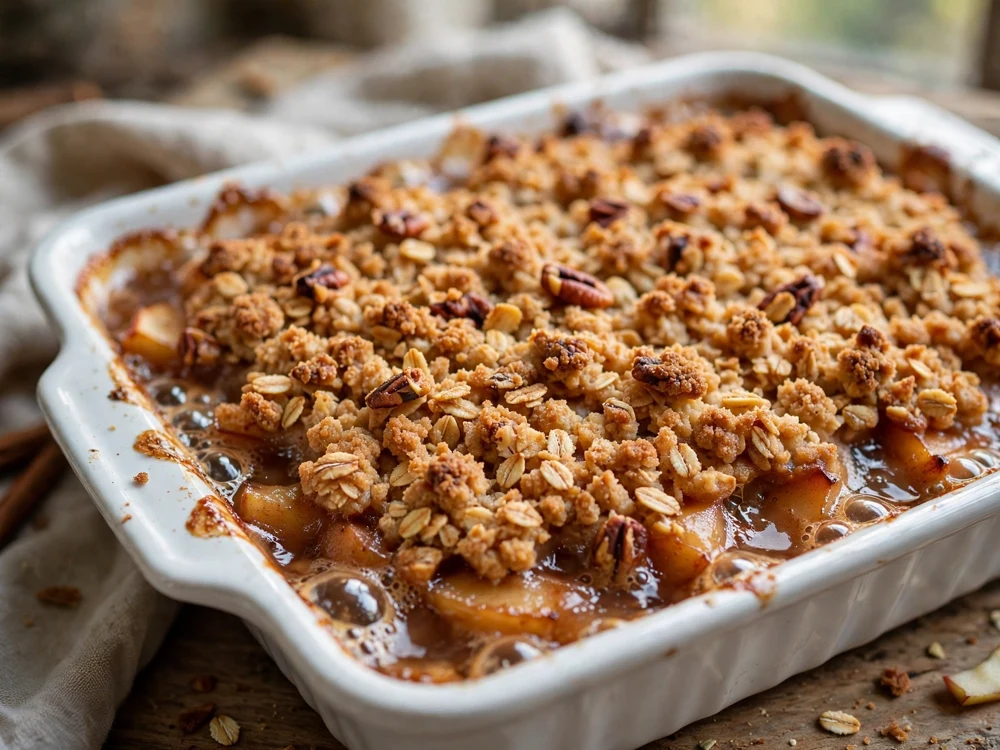
Scatter the topping evenly over the apples, leaving some loose clusters intact rather than packing it down. Bake for 40–45 minutes, until the topping is deep golden and the juices bubble visibly at the edges.
Step 6 — Rest Before Serving
Let the crisp rest for 15 minutes. This lets the filling set and the topping firm up, so you get clean, spoonable portions instead of a runny scoop.
What Are the Best Apples for Apple Crisp?
The best apples for apple crisp are firm varieties that hold their shape when baked — a blend of one tart and one sweet gives the best flavor and texture. Soft apples turn to mush, so avoid them here.
- Best firm-tart: Granny Smith, Braeburn — they keep their bite and cut the sweetness.
- Best firm-sweet: Honeycrisp, Jazz, Fuji, Pink Lady — they soften gently and add depth.
- Best all-rounder: A 50/50 mix of Granny Smith and Honeycrisp.
- Avoid: Red Delicious, McIntosh, and Gala, which break down and go watery.
Slicing them a uniform ¼-inch thick matters as much as the variety — even slices cook at the same rate, so nothing is raw while the rest turns to sauce.
Expert Tips for the Best Apple Crisp
- Keep the butter cold. Warm butter melts into the dry mix and bakes flat. Chill the cubes right up until you cut them in.
- Don’t skip the flour in the filling. Even one tablespoon thickens the apple juices enough to prevent a soupy base.
- Leave the topping loose. Packing it down suffocates the clusters; a scattered layer browns on more surfaces.
- Bake until you see bubbling juices. Golden color alone can fool you — active bubbling at the edges means the filling is cooked through.
- Rest it, always. Serving straight from the oven guarantees a runny filling; 15 minutes fixes it.
- Taste your apples first. Very tart apples may want the full ¼ cup of sugar; sweeter ones can take less.
💡 Tip: Golden color alone can fool you. Bake until you see the juices bubbling actively at the edges — that’s the real sign the filling has set, not just the topping’s color.
The Secret to a Crispy Topping
The secret to a crispy topping is the ratio of oats and cold fat to sugar, plus resisting the urge to press it flat. Cold butter cut into small clusters melts in the oven and leaves behind pockets that crisp up as the moisture bakes off. The oats provide rigid structure that stays crunchy, while the brown sugar caramelizes at the surface for that signature snap.
Two things sabotage crispness: too much butter, which pools and steams the topping soft, and packing the topping into a dense sheet, which traps moisture underneath. Keep the clusters loose and airy, and heat can reach every piece and dry it out into a crunch.
Delicious Variations & Add-Ins
Apple-Pear Crisp
Replace two of the apples with firm pears (Bosc or Anjou). Cut the granulated sugar to 3 tablespoons since pears are sweeter.
Caramel Apple Crisp
Drizzle ⅓ cup of caramel sauce over the apples before adding the topping, then finish with an extra drizzle after baking.
Healthier / Lighter Version
Cut the topping brown sugar to ½ cup, use whole-wheat flour, and swap half the butter for cold coconut oil. Add 2 extra tablespoons of oats to keep the crunch.
Dairy-Free / Vegan Version
Use firm cold vegan butter or coconut oil in the topping. Everything else stays the same — the result is just as crisp.
Individual Ramekin Crisps
Divide the filling and topping among six 6-ounce ramekins and bake for 25–30 minutes. Perfect for portioned, dinner-party servings.
What to Serve With Apple Crisp
- Vanilla ice cream — the classic; the melt into warm apples is the whole point.
- Lightly sweetened whipped cream — lighter than ice cream but still cooling against the spiced fruit.
- Warm caramel sauce — doubles down on the brown-sugar notes in the topping.
- Crème anglaise or custard — a smooth, elegant finish for a dinner party.
- A mug of chai or coffee — the spice and bitterness balance the sweetness.
How to Store Apple Crisp
At Room Temperature
Cover loosely and keep at room temperature for up to 2 days. Beyond that, refrigerate to keep the fruit safe.
In the Refrigerator
Cover tightly and refrigerate for up to 5 days. The topping softens over time — re-crisp portions in a 350°F oven for 10 minutes rather than the microwave.
Freezing & Thawing
Yes, you can freeze apple crisp. Freeze it baked and fully cooled, tightly wrapped, for up to 3 months. Thaw overnight in the fridge, then reheat uncovered at 350°F for 20–25 minutes to bring back the crunch. You can also freeze it unbaked and bake straight from frozen, adding 15–20 minutes.
Make-Ahead Instructions
Prep the components up to 2 days ahead. Store the seasoned apples and the crumble topping separately in the fridge — keeping them apart stops the topping from going damp. When you’re ready, assemble and bake as directed. The topping alone also freezes beautifully for up to 3 months; scatter it on frozen and add a few minutes to the bake.
Troubleshooting Common Problems
Why Is My Apple Crisp Topping Soggy?
A soggy topping usually means too much butter, packed-down crumble, or serving before it rests. Use the exact butter amount, keep the topping loose, and let the crisp sit 15 minutes so steam escapes.
Why Is My Apple Crisp Watery or Runny?
Runny filling comes from skipping the thickener or under-baking. The tablespoon of flour (or cornstarch) is essential, and you must bake until the juices bubble actively — that’s when the starch sets. Resting also lets the filling thicken as it cools.
Why Are My Apples Still Hard?
Hard apples mean the slices were too thick or the crisp came out too early. Cut them a uniform ¼-inch thick and confirm doneness by piercing the center with a knife — it should slide in with no resistance.
Nutrition Information
Per serving (based on 8 servings), approximate:
- Calories: 360
- Total fat: 12 g (saturated fat 7 g)
- Carbohydrates: 61 g
- Sugars: 42 g
- Fiber: 4 g
- Protein: 3 g
- Sodium: 110 mg
Values are estimates and will vary with apple variety and exact measurements.
Frequently Asked Questions
What’s the difference between apple crisp and apple crumble?
Apple crisp has oats in the topping, giving it a crunchy texture. Apple crumble uses only flour, sugar, and butter for a finer, sandier topping.
Do I need to peel the apples?
Peeling is recommended for the smoothest texture, but you can leave the skins on for a more rustic result and extra fiber.
Can I make apple crisp ahead of time?
Yes. Store the sliced apples and topping separately in the fridge for up to 2 days, then assemble and bake when you’re ready.
Can I freeze apple crisp?
Yes, baked or unbaked, for up to 3 months. Reheat baked crisp at 350°F to restore the crunch, or bake unbaked crisp straight from frozen.
What oats should I use?
Old-fashioned rolled oats. Quick and instant oats absorb moisture and make the topping soft.
Why did my topping sink into the apples?
The clusters were too small or too wet. Keep some pea-to-marble-size clumps and make sure the butter is cold so the topping holds its shape.
Can I double the recipe?
Yes. Double everything and bake in a 9×13-inch dish, adding about 10 minutes to the bake time.
How do I know when it’s done?
The topping should be deep golden and the fruit juices should bubble visibly at the edges of the dish.
Can I use canned apple pie filling?
You can in a pinch — skip the filling ingredients and use one 21-ounce can, then add the fresh topping and bake until golden.
What size dish is best?
An 8×8 or 9×9-inch dish gives the ideal fruit-to-topping ratio. A larger dish spreads it thin and dries out the apples.
Related Recipes
Recipe Card
Easy Apple Crisp
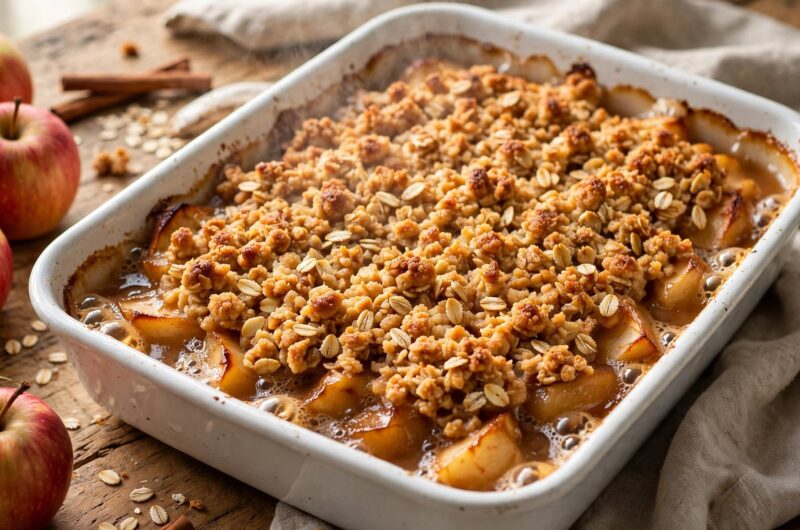
Tender spiced apples under a crispy oat-and-brown-sugar topping, made in one bowl and one dish in about an hour.
8
servings20
minutes45
minutes1
hour5
minutesIngredients
6 medium apples (2½ lbs / 1.1 kg), peeled, cored, sliced ¼-inch thick
¼ cup (50 g) granulated sugar
1 tablespoon fresh lemon juice
1 tablespoon all-purpose flour
1 teaspoon ground cinnamon
¼ teaspoon ground nutmeg
Pinch of salt
1 cup (90 g) old-fashioned rolled oats
¾ cup (95 g) all-purpose flour
¾ cup (150 g) packed light brown sugar
½ teaspoon ground cinnamon
¼ teaspoon salt
½ cup (113 g) cold unsalted butter, cubed
Directions
- Preheat oven to 350°F (175°C) and butter an 8×8 or 9×9-inch dish.
- Toss apples with granulated sugar, lemon juice, flour, cinnamon, nutmeg, and salt. Spread evenly in the dish.
- Combine oats, flour, brown sugar, cinnamon, and salt. Cut in cold butter until crumbly clusters form.
- Scatter topping over the apples without packing it down.
- Bake 40–45 minutes, until golden and bubbling at the edges.
- Rest 15 minutes before serving.
Notes
- Use a mix of Granny Smith and Honeycrisp for the best texture.nKeep butter cold and the topping loose for maximum crispness.nRe-crisp leftovers in a 350°F oven rather than the microwave.